Showing posts with label cross-knit looping. Show all posts

Thursday, February 14, 2013

Are You A Bronze Bobby Pinner, Too?


Last week, one of my students in the Cross-Knit Looping eCourse posted this comment:
I made a couple of hearts yesterday, using the flat panel technique. We spent the day in Minneapolis. I took my looping supplies. When I sat down to get started, while Gordon did some maintenance at our daughter's apartment, I realized I had not included tapestry needles in my looping bag. I stitched two hearts using a bobby pin instead of a tapestry needle. It worked, but I don't recommend it! Do I get an A for effort, teach?
A for effort, a gold star, high fives, and the 1st Annual Bronze Bobby Pin Award!

Val Tindall's Bronze Bobby Pin Heart

Later, Val shared a picture of her homework project and this:
This is the heart that I completed. The red looping was done using a bobby pin in place of my forgotten tapestry needle. I was bound and determined to get my homework done. The edging was done with the needle. I did give it a bit of stuffing between the silk backing and cross-knit lopped front. I did stitch a pin to the back. My other bobby pin sample heart is tied to our daughter's collar.
That's how the Bronze Bobby Pin Award began. Congratulations, Val, and thank you for inspiring us all!


Do you have a resourceful, can-do attitude, too? Are you the type of person who could rip up a floorboard to find a needle, or stitch with a bronze bobby pin, if necessary? If you are, grab a Bronze Bobby Pin badge from the sidebar and share your story in the comments below. We <3 inspiration!

Friday, February 8, 2013

Teaching Left-Handed When You're Not

Teaching left-handed when you're not is a great reminder of how students often feel -- awkward, uncertain, maybe anxious, or a little embarrassed. Between the e-course I'm teaching and the e-course I'm taking, this week I've felt all that.

With years of practice, I've learned to give reasonably fluid demonstrations of left-handed looping techniques, even though that hand is not naturally adept at the fine motor skills of manipulating a needle. And from years of teaching workshops in person, I know most of my left-handed students are adept at translating righty into lefty. So once the basics are established, most offers to show variations left-handed are met with, "No, thanks, I think I've got it."


Not this time. In my new cross-knit looping eCourse, I could tell from students' comments and questions that I needed to add a left-handed cross-knit edging video. Sighs of relief echoed across the interwebs when I said I would add one next week. They waited patiently. I shot it. I reshot it. And reshot it again. And finally, after two weeks, it went up on the course site.

Ginger Rogers made dancing with Fred Astaire look effortless, and she did it backwards and in high heels. In my own little fantasy world, I work to create a Ginger-esque sense of seamless fluidity in the content I produce for my eCourses. Sometimes, when I stumble (and I do) I save that footage for a gag reel at the end of a course.

Out of frame outtake 1
 Not this time. I've emptied a digital trash bin full of left-handed looping video. Such poor modeling could only confuse students further.

Back of my hand video -- not instructive.
Because I was so awkward, I kept moving the piece out of the camera's frame and closer to my bifocals. I hit the lens with my needle at least once.

Out of frame outtake2
In the end, here's what I had to do:
  • Practice. Unbelievably, I started shooting the first version without first warming up on a left-handed edging practice piece. Believably, it was painful to watch the playback of that footage. I deleted that stuff right away, then practiced before shooting Version 2.
  • Choose Easier Materials. I generally use different colors for right- and left-handed demonstrations to help me keep things straight in my head. Because I felt some time pressure on this video, initially I went with materials that were close at hand and "close enough." That was a waste of time. In left-handed demos, my most awkward moments (and this is saying something) are threading a needle and piercing anything with a needle (in this case, felt). Eventually, I got different felt. And I allowed myself to bury the tail (that piercing thing), with my right hand.
  • Alter The Progression. The most confusing part of this edging technique is the base row. It took me seven tries to record an acceptable left-handed base row. But I didn't begin with it in the edited video. Instead, I began in the middle, where my hand movements are smoother. With an audio dub, I explained: 
My left-handed demonstration skills are not as fluid as would like, so I'm going to start by showing how the stitching looks once you get going on an edging. Then we'll go back to how to begin and end.
In some ways, I think I'd like to alter the progression of the Massive Open Online Course I'm taking, too. And as an academic exercise, I can understand why the course is structured the way it is. But for much of the first two weeks I've felt like a lab rat in someone's Massive Open Online Research Project. It's not that I lack the wit or the will to operate in a self-directed learning environment. Frankly, I've done just that for years while cobbling together bits and pieces of references on a relatively obscure specialty. For me, that kind of learning generally produces excitement, anticipation, the thrill of discovery -- not the awkward, uncertain, anxiety I've felt in the #EDCMOOC.

In other words, I've felt like a right-handed stitcher demonstrating left-handed.

If I could alter the progression of the course, I would take some of the energy put into the first week's live chat session (recorded here), and put it into producing video introductions to aspects of the material by individual members of the instructional team. Yes, some students might hate the "sage on a stage" model. And they could ignore those course elements. As for me, I would appreciate some talking heads. Their absence feels too much like the reluctance of lab assistants to interact or influence their subjects.

In a class of 40,000 students, I don't really expect my comments or questions to result in an addition to the curriculum while the course is under way. But I do suspect the instructional team is feeling their share of anxiety about how this is going.

Unless they're too busy writing up lab notes about my behavior :-)

Tuesday, January 15, 2013

Creativity, Community, Connection

I'm inspired by my neighbor Marie. As far as I can see, she rises to any challenge with grace and good humor, but this one in particular strikes me as creative genius: You have a large but unknown number of cold, tired, hungry people and access only to what's in your own larder. Could you work a loaves and fishes miracle?  Marie does, with biscuits and gravy that are culinary works of art.

This post is about creativity and community that's probably familiar to many of you. And I hope you'll share your own experiences in the comments section below. But to get my thoughts in order, here's what led to the telling of this story about community.

As you may know, I live in a rural area with a small population scattered over a large geographic area. It's the type of place where firefighters and EMTs are all volunteers. My husband has served 25 years on a small department. Structure fires require assistance from neighboring departments.


Last night, as the temperature slipped toward zero, Bill was paged out to a structure fire in a neighboring jurisdiction. On his way out the door he promised to assign himself a job that wouldn't aggravate the back pain he's had since Saturday.

As he left, I was texting members of the our department auxiliary. Our newest member, Cindy, met me at the scene to pass out bottles of water, Gatorade and granola bars to firefighters. It was so cold, the Gatorade froze.

At midnight, Marie and Jonita were serving biscuits and gravy, sandwiches, cookies and coffee to firefighters from a table in the house next door to the fire scene. None of us knew the owner who graciously opened her home.

Many people from the community came together to take care of each other. One home was destroyed, but the people who lived there all got out. At this point, their story branches off, but my story about community continues -- online.

After leaving the fire scene last night, I went home and worked for a couple of hours.

First, I posted Lesson 1 for students registered in the Cross-Knit Looping eCourse. The roster includes both first-timers and returning students from across the U.S. and in Europe who share a fiber interest. But you know how it is: You learn who the dog lovers are, what other interests students share, whose life is complicated by medical concerns, who's planning an adventure. And you celebrate successes and discoveries together. In other words, it's a community.

Next, I posted a few pictures I took on the fire department's Facebook page. Many people in the community have a limited understanding of what volunteers firefighters do. Much of what they do isn't exciting and it's virtually invisible: Two hours of repacking hoses, emptying creek water from the tanker and refilling it with clean water, going to town to get replacement parts for couplings that broke in the cold. Firefighters don't do all that to get their pictures tagged on Facebook. But their spouses, cousins, neighbors and friends who are on Facebook are proud to share that those pictures with their friends (or Friends, in Facebook parlance). 

I see some of my neighbors more on Facebook than in real life. But you know what? I love that I can talk to someone I'm sitting next to about a picture of them I saw on Facebook. I love staying in touch with students who took fiber art workshops with me years ago. I love reconnecting with old friends from our canoe and kayak school days. I love keeping up with our godsons and a passel of kids who are interesting young adults now. And I love following the adventures of a group of women who became friends in a willow basketry class at Sievers lo, these many years ago. Those are the kind of friends who may not see each other for months or even years, then pick right up where we left off. That was true before Facebook. It's true with Facebook. And I'm sure it will be true After Facebook. I suspect it will be true after we're all just so much cosmic dust.


Because what connects us isn't digital. It's the community we built. Together.

As you may know, I'm taking an online course on e-learning and digital cultures. It doesn't start for a couple of weeks. So for now, I'm only guessing at how the course may impact my perception of "being human in the digital age," or how it might alter my approach to teaching online. Here's what I do know:

What connects us is the community, not the carrier. It's what we build together that makes a difference in our lives.

P.S. I would love to hear your stories of creativity, community and connection. Hit the Comments link below and say your piece. Thanks!


Monday, December 10, 2012

5-Panel Project Bag -- Knitting + Crochet + Looping

Suppose you took Mastadon Stew to a potluck and someone asked for the recipe. OK, that wouldn't happen because, well, mastadons are extinct. But when you're asked for a recipe or pattern for something made with an ancient technique that's not extinct but is comparatively obscure? Something like cross-knit looping? Thank goodness for the internet, where you can link to references and inspirations.

Cross-knit looping is worked with a single needle and is incredibly portable and forgiving of interruptions. It's great for covering up selvedges and seamlines on knitting, crochet, weaving and felt, adding a lovely design element that also helps add structure and/or stabilize edges.
Donna Kallner's 5-Panel Project Bag made with naturally-dyed yarns includes knitting, crochet and cross-knit looping
Last fall, a student asked if I would share the pattern for this project bag. On things I make for myself, my "patterns" are much like most of my cooking recipes: I generally don't record specific quantities, but I can tell you how I make something ("cook brown rice and some black beans with cumin and garlic, cool, dress with orange juice viniagrette, add some fresh sweet corn, onion, red pepper, maybe grilled zucchini...."). I assume you'll adjust proportions to your own tastes and materials/ingredients anyway.

So here's the "recipe" for my drawstring project bag.

5-Panel Drawstring Project Bag
  • Knit 2 panels for the front and back of the bag. Mine are 6" wide x 5" tall. I knit one in garter stitch. For the other side, add variety to a panel of stockinette stitch by making intermittent rows of knit to make garter stripes.
  • Knit 2 panels for the sides of the bag. Mine are 3-1/2" wide x 5" tall. One is knit in loose 2/2 ribbing (casting on for the 5" dimension). The other is seed stitch (odd rows are knit1, purl 1; even rows are purl 1, knit 1).
  • Crochet a bottom panel. Mine is 6" wide x 3-1/2" deep. I used single crochet to make a firm bottom.
  • Sew or slip stitch crochet one edge of each upper panel (front, back and sides) to the base. 
  • Attach edges of upper panels to form the bag.
  • Crochet a few rows (or more) around the top of the bag to make a rim.
  • Crochet a drawstring channel by skipping stitches and making long posts. 
  • Add another row or two of crochet above the drawstring channel to complete the rim.
  • Braid or chain two drawstrings long enough to travel the circumference of the bag.
  • Thread one drawstring through the channel all the way around the rim of the bag. Tie off and add a small tassel, if you like.
  • To thread the second drawstring, begin on the opposite side of the bag from where you started with the first one.
  • Work cross-knit looping over the seam that connects side panels to the base. I learned this application for cross-knit looping from Laverne Waddington. This and many other uses of cross-knit looping are included in my new eCourse, which begins January 15. (There's a short video trailer here, and registration is open here).
  • Work cross-knit looping over the seam where the side panels meet the rim. 
Cross-knit looping masks the seams where panels meet and adds contrast in color, line and texture.
Apply whatever variations strike your fancy. You could make the panels and rim all knitting, all crochet, or even all looping. I chose to combine knitting and crochet because I wanted to show something familiar to knitters and crocheters who might be enticed to try looping. You could make a little gift bag from old swatches used to determine gauge for knitting projects. Or use panels of felt or fabric for the base and sides.

Make the bag any size you like. I chose this size because it would hold just one project and fit beside me on the seat while traveling (I have a tendency to overpack given a larger bag). On a larger bag, though, I might cover all the vertical seams that join panels with cross-knit looping. That would add some structure to help the bag stand up.

Sadly, it appears that the Licorice Twist yarn I used is no longer available from Dharma or anywhere else I can find. The main body of the bag was immersion dyed with willow bark and walnut. The yarn for the cross-knit edging is from a ball I've been hoarding for years since I took a natural dye class at John C. Campbell Folk School. I think it was from Knit Picks, and I think it was dyed with lichen then overdyed with indigo.

In other words, the exact materials I used are not available for you to make an exact replica of this bag, and that's a good thing. You'll come up with something of your own that uses the materials you have beautifully.

I'd love to see what you make! Please, please post pictures of your variations on this recipe on my Facebook page.


Friday, December 7, 2012

Registration Open for Cross-Knit Looping eCourse

It's official: Registration is open for the my newest eCourse, Cross-Knit Looping. The technique is sometimes called Coptic knitting, Tarim stitch or Viking knit (that's right -- the fine silver jewelry is the same structure). Cross-knit is part of a large family of looping techniques. It can look so much like stockinette stitch that early artifacts were often misidentified as knitting. But it's pure looping: The entire length of the thread is pulled through on each stitch, and it can't unravel like knitting.

Click to go to eCourse registration
Cross-Knit Looping runs January 15-February 28, 2013. Here's a short video trailer I made for the eCourse.


There's more info and you can register for the class here.

 Like other forms of looping, cross-knit can stand entirely on its own. But it marries so beautifully with knitting, crochet, weaving and felt that I've included some fusion projects in the course. And I think handspinners and dyers will absolutely love this technique.

Cross-knit looping sun tea jar cozy and water bottle caddy (with felt)
Knit neck warmer with cross-knit looping placket and buttons
I really need a model to photograph instead of trying to shoot myself in the mirror. Incidentally, these pictures show projects done with my naturally dyed yarns. There are yarns straight from my LYS used in the course, as well.

Donna's project bag -- knitting, crochet, and cross-knit looping
One of my Sievers students this fall (Roseann?) asked for a recipe (in lieu of a pattern) for the drawstring project bag pictured above. I'll post that next time.

Saturday, November 24, 2012

The Video Studio

After a short break to celebrate Thanksgiving with family, I'm back to work on a new eCourse on cross-knit looping, which I'll tell you more about soon. In the meantime, here's a peek at my new video "studio."


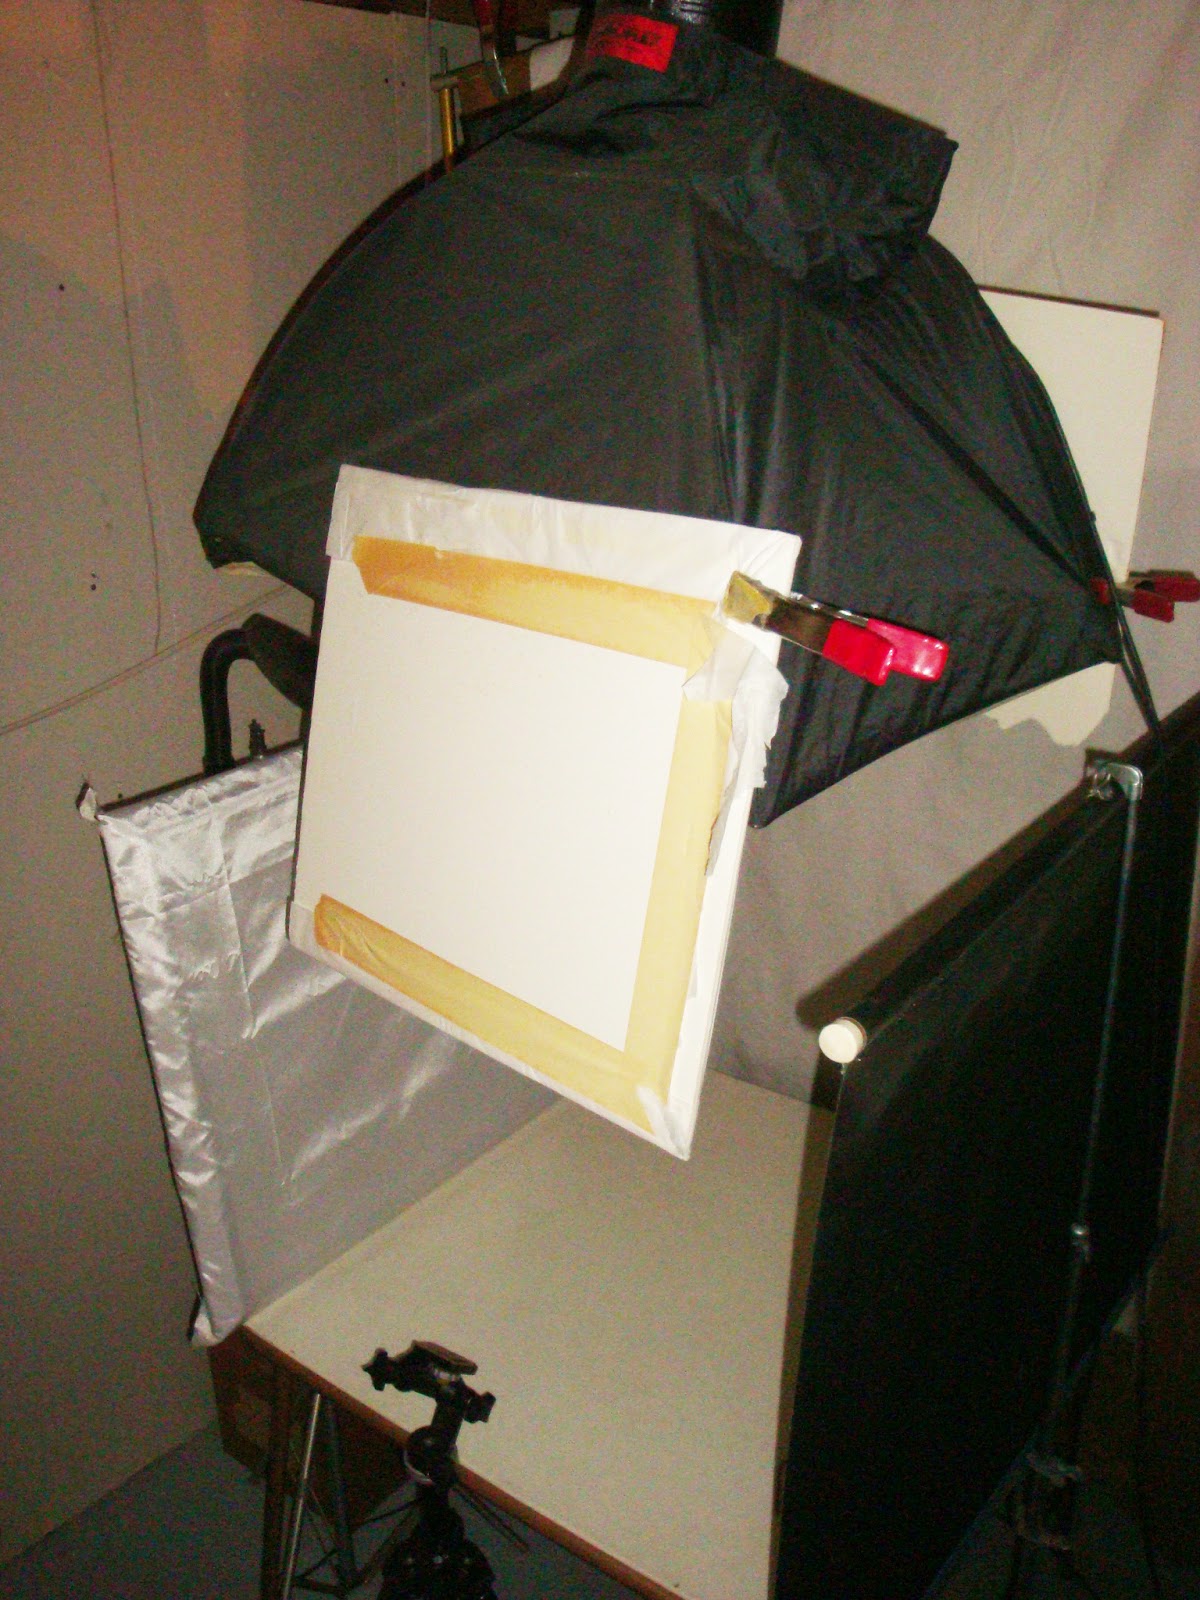
The homemade diffuser on the left is fabric stretched on an old picture frame. On the right is an old slide projector screen I found at the thrift shop. The white top on the card table (a family heirloom from the 70's) is easier for shooting than the fabric-covered table I used before. You can't really see the fabric backdrop or the two bounce lights. But here's the key element:


That black tent-like thing at the top covers a modeling lamp that gives diffused light from overhead. A friend who's a professional photographer helped me set up a photo studio back in the late 1990's, when I was still shooting my work on 35mm slides. I think we traded her a canoe for equipment, help setting it up, and lessons on how to shoot with it. Once I went digital, the flash didn't sync with my camera. It didn't occur to me until recently (duh) that I could use the modeling lamp without the flash.

The new set-up is tucked into a small space in our basement between the utility room and the cold room where we store squash and homemade wine. There isn't quite enough space to shoot the short "talking head" segments of the course, but it's working great for the close-up shots of my hands demonstrating techniques.

Speaking of hands, I stained my right hand with black walnut dye when my glove sprung a leak while I was doing "just a quick project." So no more dyeing until the last of the video is shot and edited!

Thursday, September 20, 2012

Rocky Mountain Looping Adventure

Why do I leave my camera in the bag in the back of the vehicle? The weather in Denver last weekend couldn't have been more perfect, and I don't have a single photo of the gorgeous mountain range at sunset to show you. But there were smiles as big as the Colorado sky on the faces of my lovely host and the program committee person for the Rocky Mountain Weavers Guild.


The guild had invited me to do a lecture on looping and a couple of short workshops last weekend. After the lecture, I spoke briefly with Jean Scorgie, who, back in the early 1990's, wrote an article on cross-knit looping for Piecework. It was a pleasure to tell her how much help her needleknit finger puppets article was to me in my quest for looping knowledge. No photo, of course -- I was too busy talking.


I did manage to get some quick shots of my students' work before everyone scattered. The afternoon after the lecture, we did skipped stitch looping using wool yarn over bars of soap. With use, the wool will felt and their projects will evolve into lacy little felt bags.


During Sunday's Burundi looping class, the chorus of ideas I heard for how students planned to use their new skills was music to my ears.


The lecture and workshops were held at TACtile, which had the Studio Art Quilt Associates Regional Members' Showcase on exhibit.


TACtile is located above the JHB Button Museum, so I had a few minutes to indulge my love of buttons, thimbles and vintage stitching paraphernalia.


One of my students graciously checked out three books from the guild library so I could look at them overnight. I could hardly keep my eyes open, but read enough to know I need to be looking for copies of these Anne Bliss titles for my personal library.

That's a logical place to break and come back next time with more on natural dyeing. But first, I just have to say how much I enjoy the people I meet on these little adventures. This time, I met someone with an adult child in circus school in Australia (her own world adventures as part of a handbell choir were fascinating in their own right). I've met people who have visited the South Pole, danced on American Bandstand, worked for Barbie (THE Barbie), and had all kinds of fascinating experiences.

Monday evening I got home tired and happy. My husband was vacuuming and had sheets on the bed for a visit from his brother and sister-in-law, who arrived shortly after I did. We had a lovely couple of days with our company, and I'm just now starting to share with him the stories from Denver. I must remember to tell him about the snow bike.

Seriously -- next time, back to natural dyeing!

Tuesday, April 24, 2012

Thrifty Gifts For Mom And Moi

I've gotten a lot of mileage out of a cone of silk noil I bought at a garage sale. Yesterday, I dyed yarn for a Mother's Day gift I need to get started PDQ. The little rice steamer I bought at a thrift shop to use for natural dyeing also works like a charm for small-batch steaming of acid dyes.


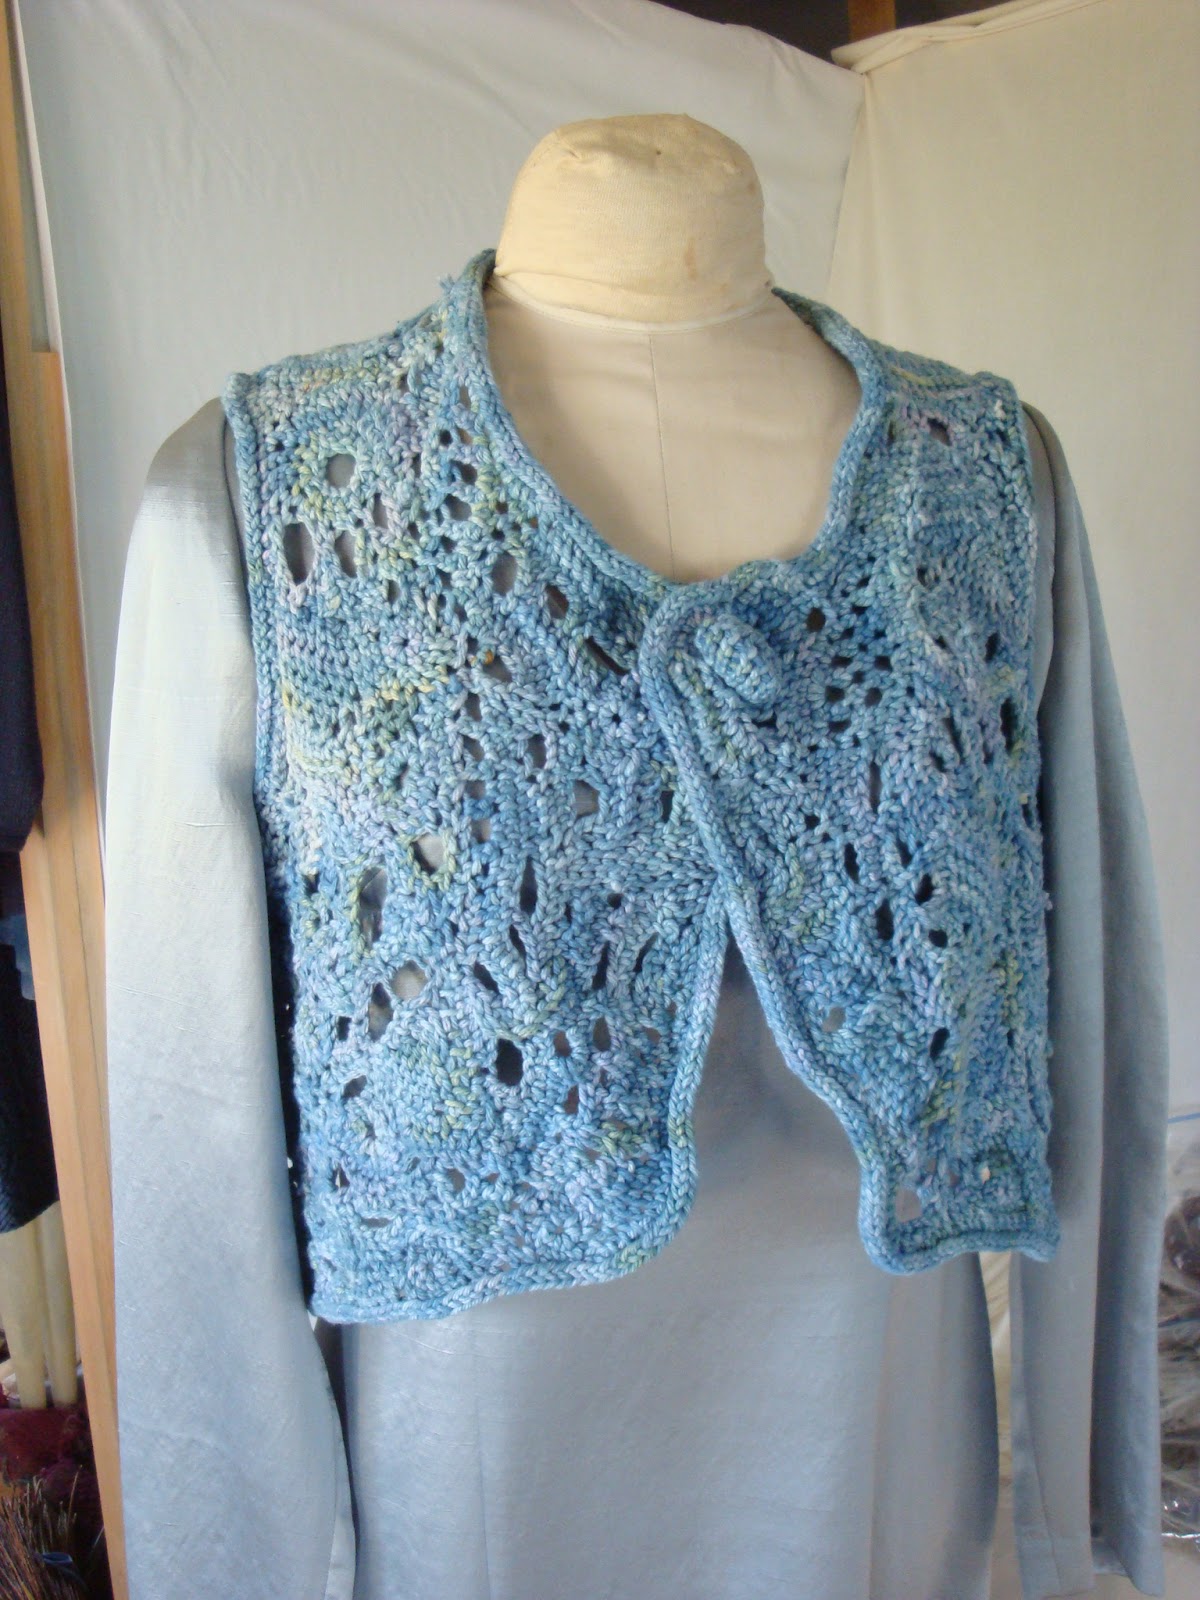
And I finally finished and blocked a gift for myself that I've been working on off-and-on for more than a year. This freeform looping vest was made from cotton yarn I got from my sister-in-law's BFF after she cleaned out a relative's estate. I overdyed the yarn in the indigo vat.


My closer-to-my-size dress form (bought at a garage sale) is still in a local store displaying willow-dyed scarves I have for sale there. This smaller dress form, also from a garage sale, is at least four sizes different from me, so the back looks almost bell-like on her.


On me, though, it skims right where I wanted it to skim, and I love the cross-knit looping edging.

I make a lot of stuff I use, and a lot of class samples. Sometimes, those are one and the same, like this little pouch I made working along with students in the current session of my New Age Looping Basics eCourse. It now holds the card reader for my computer.


But the freeform vest is the largest project I've made just for myself and just because in a long time. It's too casual to be impressive, and 99.9% of the world will look at it and assume it's crochet. I don't care. I'm a jeans-and-boots kind of girl, and I love it.

I phoned Mom to tell her I finished a gift for myself so hers might be a little late (since I hadn't started it yet). She said, "I know you'll enjoy wearing it as much as I enjoy wearing the things you make for me." She's right.

I'll keep you posted on what I'm making with the silk noil. In the meantime, if you're looking for an idea for your own gift-making, here's a link to last year's how-to on the Mother's Day Corsage-ish.

Honestly, most of the time I get more enjoyment out of making gifts for other people than out of anything I make just for myself. But I'm feeling pretty special because someone who really knows me and is exactly the same size and shape as I am spent all this time on a gift for moi. I might do it more often.

You could inspire me to do that. So tell me: What's the best gift you ever made for yourself, or one you're working on or planning?


Thursday, April 5, 2012

How Long Did It Take You To Make That?

You get that question, don't you? How in the world do you answer it?


From start to finish, this little freeform looping vest is going to clock in at over a year. I only know that because I looked it up on this blog. The first post was in February of 2011. A month later, I'd overcome a minor hurdle and was making progress. Then, of course, I got busy preparing for and traveling to teach workshops. Like plot developments that impede the course of true love in a novel, there's always been some good reason to set this piece aside.

But this week, I may -- may! -- get it finished.


As far as I can tell, I'm satisfied with the back. It took about 20 shots with the digital camera and a full-length mirror to see what it looks like from behind on my actual body.


I'm finishing the edges with cross-knit looping, using a brilliant technique I learned from Laverne Waddington. The binding is done on both armholes and the back hem. I'm guessing three more evenings ought to finish the front edges and neckline.

How much actual stitching time have I spent on something people will probably assume is crocheted? Snort. Maybe 40 hours. So far. And that's a guess, because I haven't been keeping track. I hate keeping track, and only do it when I have to know a project fits within time parameters given by event organizers.

Time is sooo far down on the list of things I'd like people to wonder about, if they're going to wonder about anything when they see this garment. I figure I'm not alone on that score.

What do you wish people would ask instead of "How long did it take you to make that?"


Thursday, November 11, 2010

Cross-Knit Looping On The Edge


Last winter I read a post from backstrap weaver Laverne Waddington about how she uses cross-knit looping as an edging. That set wheels turning in my head. I did a little sampling in September, and finally finished a project -- a bag with I-cord handles that hangs from the "ears" on the back of the chair  by my spinning wheel.

I wanted to use the cross-knit edging technique to combine components knit the "regular" way --  that is, with a pair of knitting needles, pulling up yarn from a continuous ball. (Looping, on the other hand, uses one needle and you the entire length of shorter thread through on each stitch.) I knit the base of the bag in stockinette, then did sections of garter stitch, sideways ribbing, and stockinette in the round (which I turned inside out).

Once the knit components were finished, I butted the edges and joined the sections with cross-knit looping. When all the pieces were assembled, I finished the rim with more of the same. Here's what that looked like:

Cross-knit looping as an edging
 At the end of each row, the thread passes through the fabric. That puts you in position to stitch the next row -- simple and brilliant.
First stitch in new row of cross-knit looping edging
It makes a lovely selvedge, and adds stability to the edge.

In the pictures, you see me working with the bulk of the fabric to the left. I tried different hand positions throughout the project but didn't photograph them. Usually, I decide on a preference based on how gravity "drops" the thread and how my non-dominant (left) hand is positioned to help with tension control while my dominant (right) hand manages the needle. I'm going to try another piece with different hand positions, but think I prefer working with the bulk of the fabric to the right (not the way you see pictured).

When the bag was assembled and edged, I used regular looping to add a deep outside pocket (for knitting needles), a short outside pocket (for my MP3 player, with spinning podcasts), and a big looping freeform flower with a dense center where I can stick tapestry needles and find them again.


Thank you, Laverne, for the inspiration to do something different with cross-knit looping!

Friday, April 30, 2010

Plying, Playing and Winging It

Before leaving for Amana last week, I managed to ply my first yarn on my new spinning wheel. Since I was pressed for time (and didn't think of it until later), I didn't check the Wraps Per Inch or weigh the yarn.

Eyeballing and winging it are well within my comfort zone. I know I can always come up with a solution if I run short. But taking a few minutes to check the weight and WPI would certainly make it easier for someone else to begin a similar project. Next time.


This time, though, I guessed that I had enough yarn to make a small pouch using a couple of looping variations. This fairly bulky yarn let me work on a scale that was good for demonstrating to the public. Like most looping, this was a good project for a situation where there were many distractions (like good conversations and the siren call of the cookie table). I did manage to make an unintentional decrease in the cross-knit section. The world did not stop spinning on its axis as a result.

Starting from a needle chain base, I worked the bottom in Burundi stitch (a complex looping variation that intersects with multiple previous rows). I finished that section with a row of double-crown (a knotted looping variation). Then I switched to cross-knit looping, which looks like stockinette stitch in knitting. A few more rows of Burundi help stabilize the rim. I added a tubular strap with a loop on the end that goes through another loop and around a button on the opposite side of the bag. The button I made from looping stuffed with the extra-kinky bits of the yarn that I broke off rather than fight with on the body of the bag.

I finished with exactly two inches of yarn to spare.


The double-loop closure should be secure enough to attach to a belt loop. I'll use this bag for my digital camera. But I want a bit more protection for the screen side, so I'll add an outer pocket, which will also give me a place to keep paper, a pen, and an extra media card. I'll also add a tab and button at the top as insurance to make sure my camera can't pop out. My plan is to pull out the walnut dyebath for the yarn I'll use for the pocket and tab. With a bit of color contrast to add interest, who'll know that I ran out of yarn? You won't tell, right?

By the way, en route to Amana I stopped at Borders in Madison to go to the restroom and check out the magazines. I bought the May 2010 issue of Yarn Forward, a British knitting magazine, which has a tutorial article on naalbinding by Swedish fiber artist Barbro Wilhelmsson. Looks like you can buy a digital version of the issue here.

Monday, April 5, 2010

Cross Knit Looping Two Ways

I got pretty excited over the weekend, and it wasn't because of an Easter candy sugar rush. It's because I found a tutorial on cross-knit looping posted by Laverne Waddington on Backstrap Weaving. She shows how this looping variation can be used to edge a woven or knit piece:
It completely wraps around the edge and so can be used to hide a less than perfect selvedge or, by working it in a completely contrasting yarn color, it can add more life and interest to a piece.
Cross-knit is one of my favorite looping variations. I generally work it in the round for things like bags. Once you get started, Laverne's description for this edging is very much like working in the round with what I call a return to jump from the end of one row to the beginning of the next row. Toward the bottom of the post where you see Laverne's folded card images, imaging the return passing through the fabric (instead of along the lags of the previous row, for those of you who are following along in the glossary from a class).

For me, I think it would be easier to manage the thread if I held the work in a top-down orientation and worked from left to right (I'm right-handed).

This is an edging I definitely want to try. In the meantime, I'm posting an image of cross-knit looping worked in the round. In this MP3player cozy, I started with a needle chain oval base and worked from the base to the rim. In other words, the piece was held upside-down as I was working it. I've rotated a copy of the image to give you a better sense of the orientation.

The rolled edge on this piece gives you a peek at what the back side of the fabric looks like. And if you're playing along at home I'll just mention that I worked this project in a wool-mohair yarn with spit splices. Can't wait to see what happens when I run a Google search for that phrase.

Do you plan to give Laverne's edging a try? Or are you working on other looping projects or samples?

Sunday, December 13, 2009

The Age Of Discovery

Last week I made an MP3 player cozy using a technique called cross-knit looping. While I was stitching, I had some time to think about how much my world has changed recently.

In rural areas like ours, internet options are very limited. Until two months ago, we were still on dial-up. Now, with a faster connection, pages load before I’ve lost interest and I’m learning a lot. In the last few weeks, I feel like I’ve traveled around the world and through time.

That reminded me of an article I read some time back by Jennie Durkin. Published in 1989 in the Bulletin of the Needle and Bobbin Club, it’s called Loop-Stitch Embroidery: Peruvian and Elizabethan. Thanks to the University of Arizona, here’s a link to the PDF.

Durkin’s study of Peruvian textiles led to her recognition of an apparent connection between the embroidery version of cross-knit looping (from Peru’s Nazca region) and Ceylon stitch (which apparently was not used in England before the reign of Elizabeth I).

A skilled embroiderer in the Elizabethan age would have been able to look at a sample of a foreign technique and figure out how to reproduce it. There may be no direct connection between the Spanish conquest of Peru and the English court, but there were plenty of indirect routes by which the connection could have been made. As she says,
“The absence of direct contact did not prevent the spread of potatoes and tobacco by the later 16th century. The nature of the interest in embroidery at that time required only one example to reach a competent embroiderer.”

As my voyages continue in my own Age of Discovery, I can’t help but wonder what the Virgin Queen would have worn if her ladies had been reading the blogs.