
Cross-knit looping is worked with a single needle and is incredibly portable and forgiving of interruptions. It's great for covering up selvedges and seamlines on knitting, crochet, weaving and felt, adding a lovely design element that also helps add structure and/or stabilize edges.
 |
| Donna Kallner's 5-Panel Project Bag made with naturally-dyed yarns includes knitting, crochet and cross-knit looping |
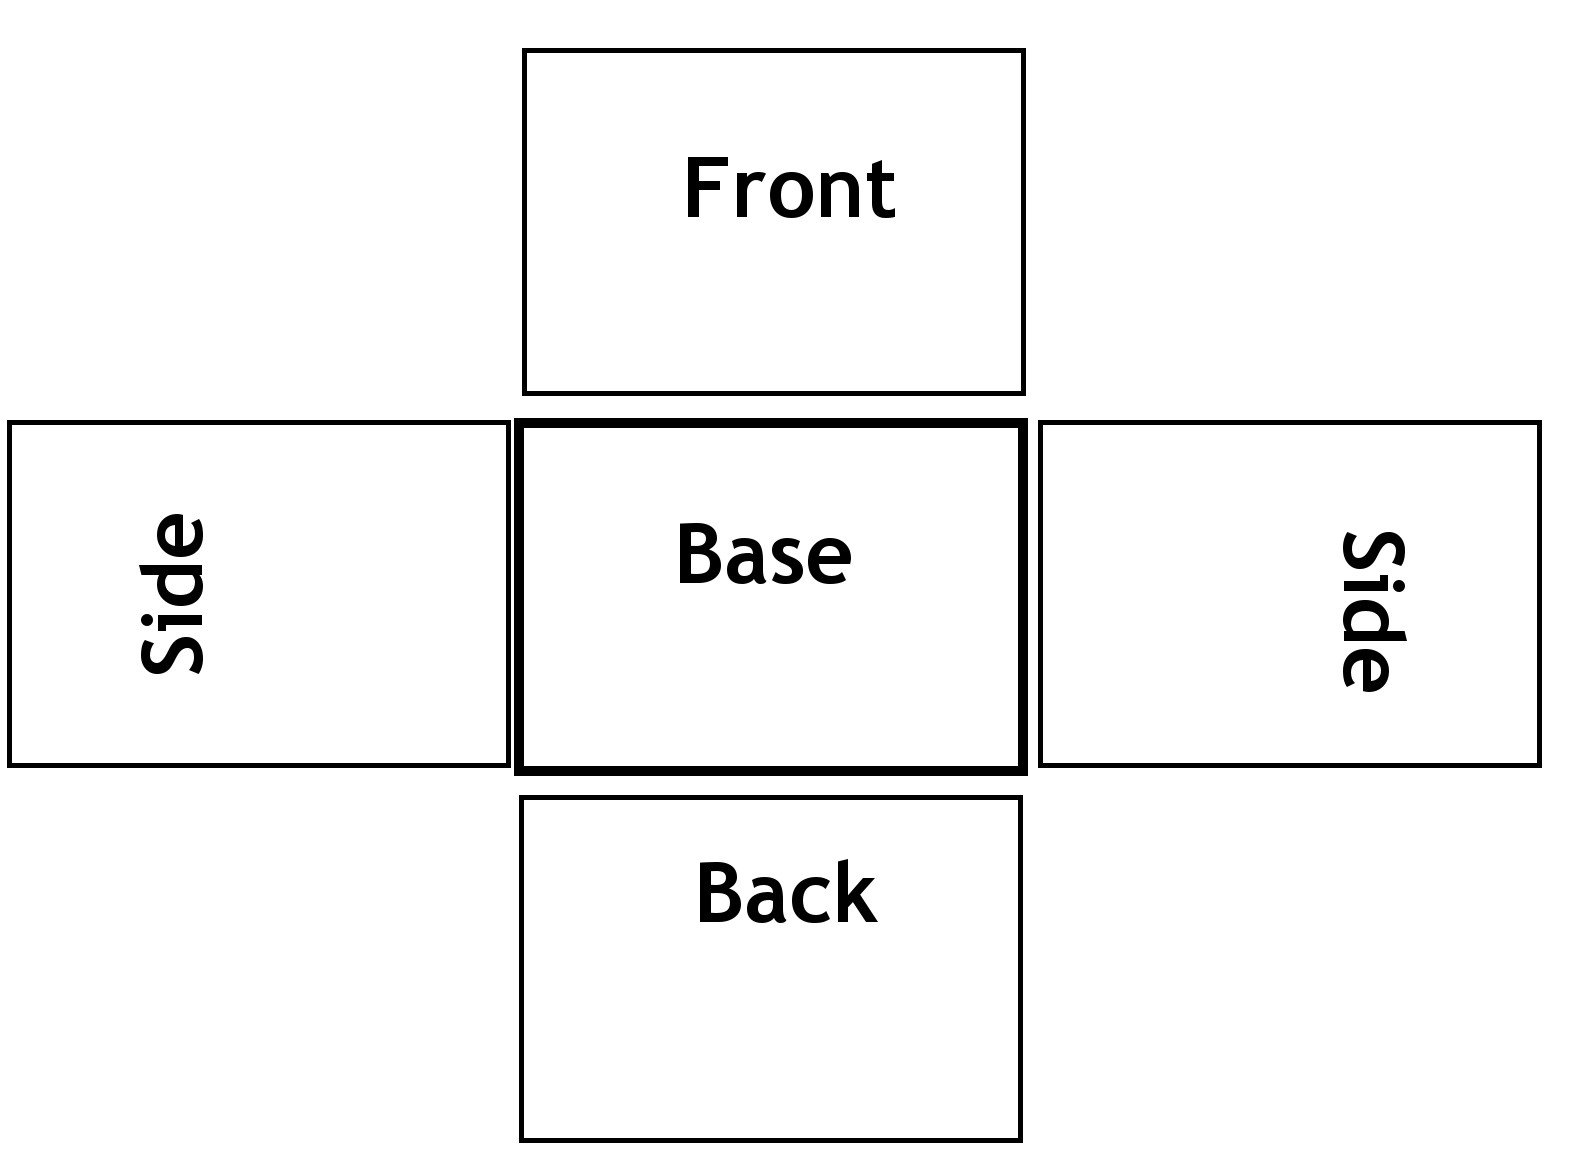
So here's the "recipe" for my drawstring project bag.
5-Panel Drawstring Project Bag
- Knit 2 panels for the front and back of the bag. Mine are 6" wide x 5" tall. I knit one in garter stitch. For the other side, add variety to a panel of stockinette stitch by making intermittent rows of knit to make garter stripes.
- Knit 2 panels for the sides of the bag. Mine are 3-1/2" wide x 5" tall. One is knit in loose 2/2 ribbing (casting on for the 5" dimension). The other is seed stitch (odd rows are knit1, purl 1; even rows are purl 1, knit 1).
- Crochet a bottom panel. Mine is 6" wide x 3-1/2" deep. I used single crochet to make a firm bottom.
- Sew or slip stitch crochet one edge of each upper panel (front, back and sides) to the base.
- Attach edges of upper panels to form the bag.
- Crochet a few rows (or more) around the top of the bag to make a rim.
- Crochet a drawstring channel by skipping stitches and making long posts.
- Add another row or two of crochet above the drawstring channel to complete the rim.
- Braid or chain two drawstrings long enough to travel the circumference of the bag.
- Thread one drawstring through the channel all the way around the rim of the bag. Tie off and add a small tassel, if you like.
- To thread the second drawstring, begin on the opposite side of the bag from where you started with the first one.
- Work cross-knit looping over the seam that connects side panels to the base. I learned this application for cross-knit looping from Laverne Waddington. This and many other uses of cross-knit looping are included in my new eCourse, which begins January 15. (There's a short video trailer here, and registration is open here).
- Work cross-knit looping over the seam where the side panels meet the rim.
 |
| Cross-knit looping masks the seams where panels meet and adds contrast in color, line and texture. |
Make the bag any size you like. I chose this size because it would hold just one project and fit beside me on the seat while traveling (I have a tendency to overpack given a larger bag). On a larger bag, though, I might cover all the vertical seams that join panels with cross-knit looping. That would add some structure to help the bag stand up.
Sadly, it appears that the Licorice Twist yarn I used is no longer available from Dharma or anywhere else I can find. The main body of the bag was immersion dyed with willow bark and walnut. The yarn for the cross-knit edging is from a ball I've been hoarding for years since I took a natural dye class at John C. Campbell Folk School. I think it was from Knit Picks, and I think it was dyed with lichen then overdyed with indigo.
In other words, the exact materials I used are not available for you to make an exact replica of this bag, and that's a good thing. You'll come up with something of your own that uses the materials you have beautifully.
I'd love to see what you make! Please, please post pictures of your variations on this recipe on my Facebook page.
No comments:
Post a Comment
This blog has moved to http://donnakallnerfiberart.com. I hope you'll join the conversation there!