There are only a few pieces left from the man's camel hair coat I bought at Goodwill last fall. Students in a natural dye class last fall used most of the coat. I kept the parts that were gunky with fused interfacing.
Some of that got used in a project for the Cross-Knit Looping eCourse that started this week. Registration for XKL closes tomorrow, but you can still get into New Age Looping Basics, which begins February 5.
Students will see it in Lesson 2, which posts next Tuesday.
I love working with this camel hair fabric and wish I had more. But I'm not even tempted to contribute my own camel hair coat to the cause. It was my mom's playground duty coat. When she retired from teaching, she gave it to me. It has to be 25 or 30 years old but it's still my go-to coat for dressy occasions and any occasion when temps are sub-zero.
You may see a picture of it next week.
I guess it's time to scour the thrift shops for another camel hair coat.
What kind of recycled materials are you on the hunt for? And what's your best thrift store find?
Sign up for my email newsletter here.
Showing posts with label recycling. Show all posts
Friday, January 18, 2013
Tuesday, April 24, 2012
Thrifty Gifts For Mom And Moi
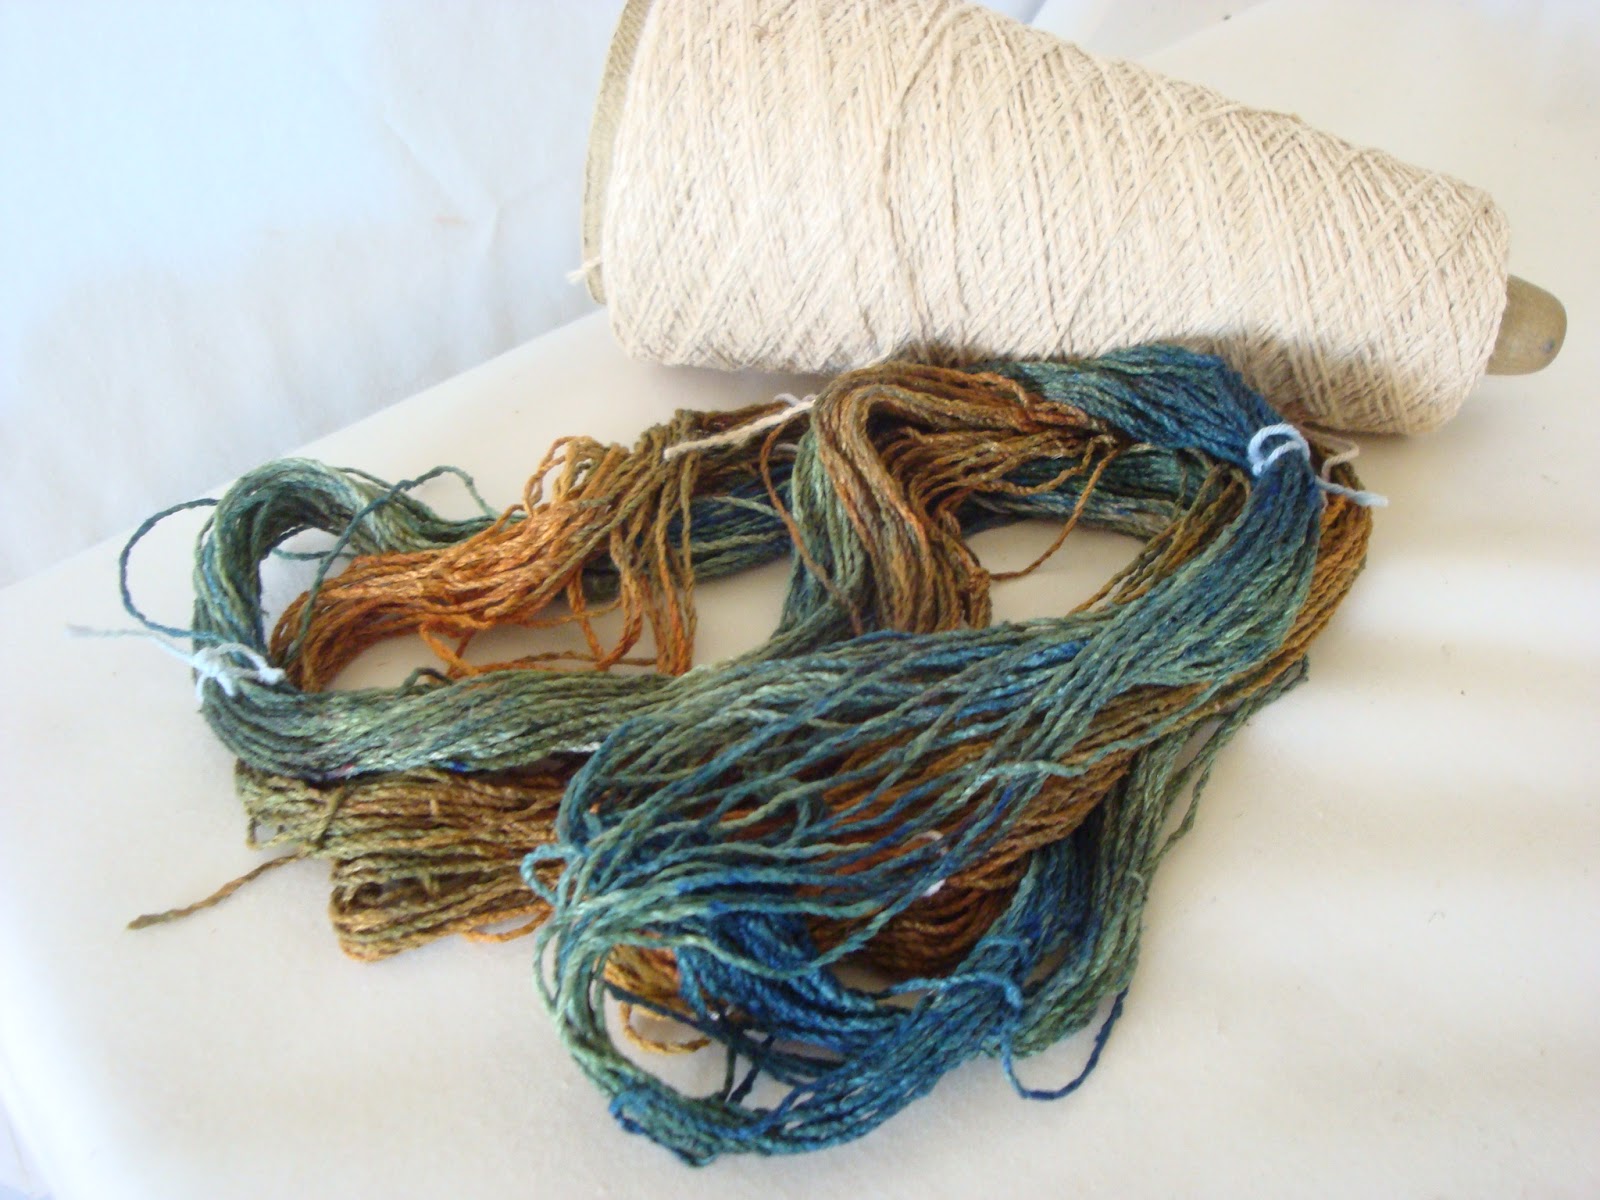
I've gotten a lot of mileage out of a cone of silk noil I bought at a garage sale. Yesterday, I dyed yarn for a Mother's Day gift I need to get started PDQ. The little rice steamer I bought at a thrift shop to use for natural
dyeing also works like a charm for small-batch steaming of acid dyes.
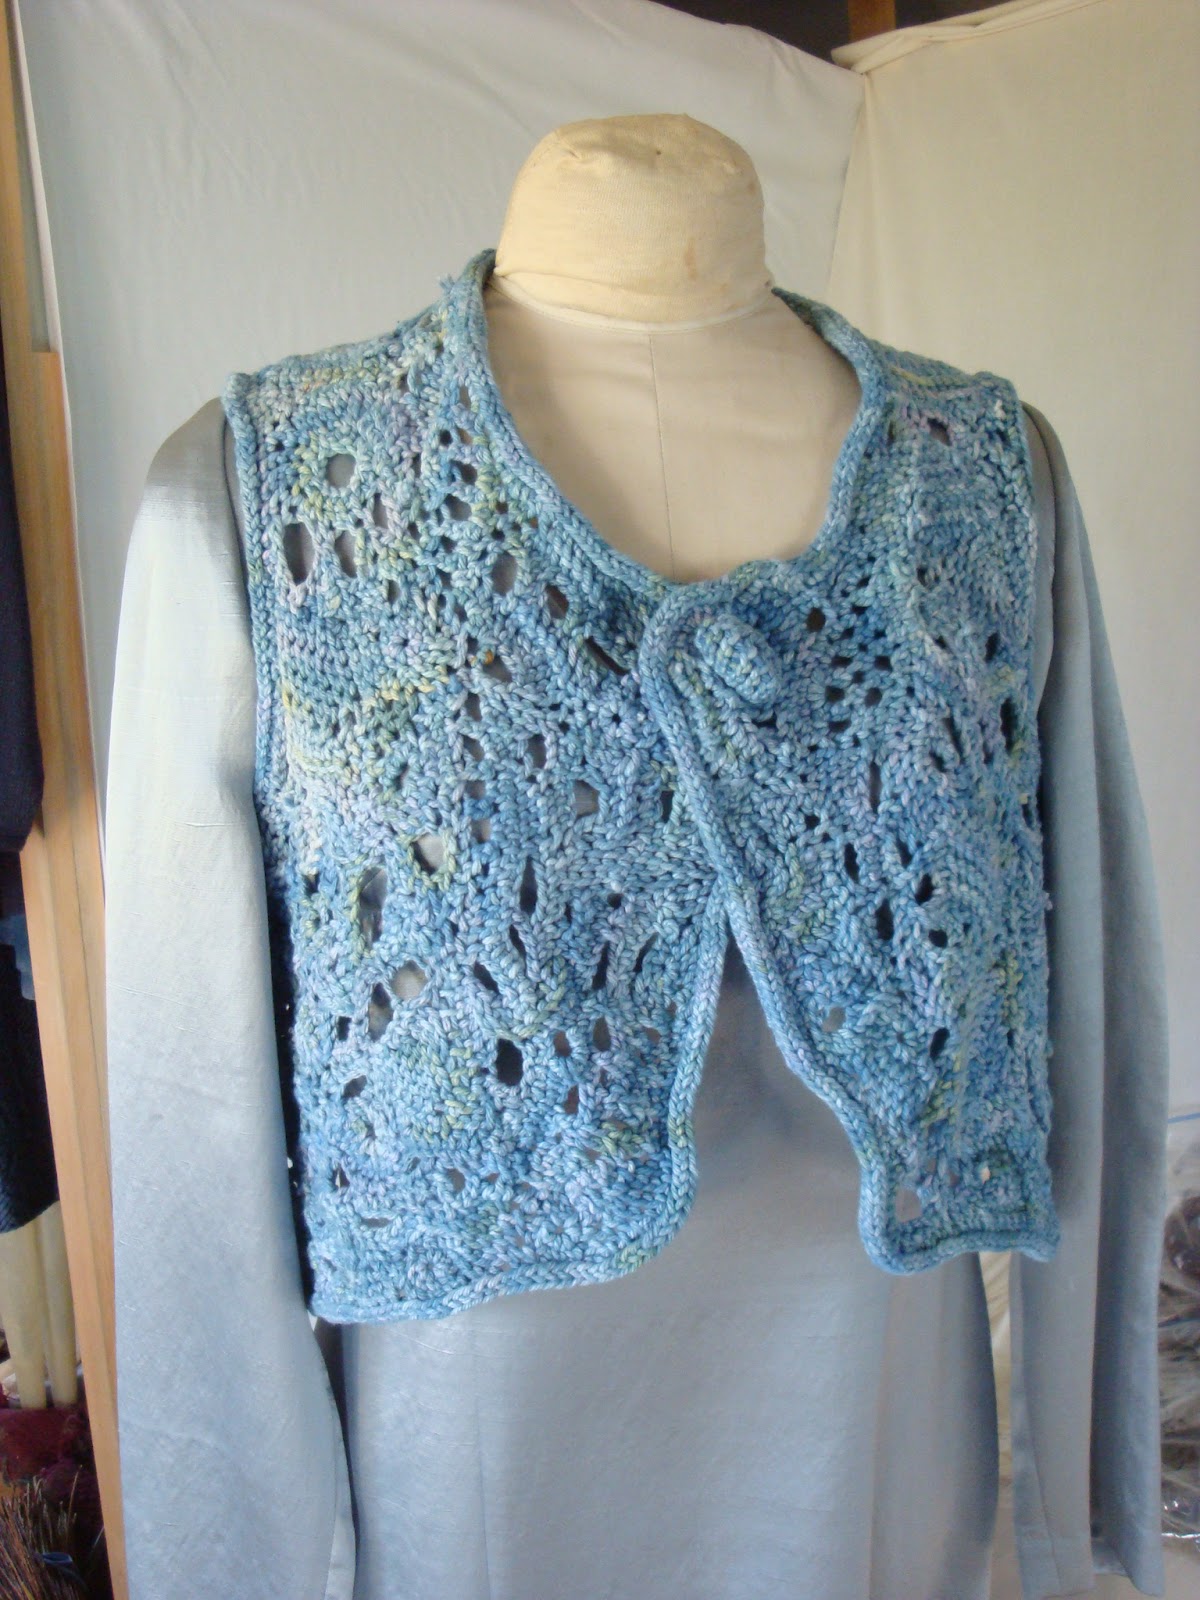
And I finally finished and blocked a gift for myself that I've been working on off-and-on for more than a year. This freeform looping vest was made from cotton yarn I got from my sister-in-law's BFF after she cleaned out a relative's estate. I overdyed the yarn in the indigo vat.
My closer-to-my-size dress form (bought at a garage sale) is still in a local store displaying willow-dyed scarves I have for sale there. This smaller dress form, also from a garage sale, is at least four sizes different from me, so the back looks almost bell-like on her.
On me, though, it skims right where I wanted it to skim, and I love the cross-knit looping edging.
I make a lot of stuff I use, and a lot of class samples. Sometimes, those are one and the same, like this little pouch I made working along with students in the current session of my New Age Looping Basics eCourse. It now holds the card reader for my computer.
But the freeform vest is the largest project I've made just for myself and just because in a long time. It's too casual to be impressive, and 99.9% of the world will look at it and assume it's crochet. I don't care. I'm a jeans-and-boots kind of girl, and I love it.
I phoned Mom to tell her I finished a gift for myself so hers might be a little late (since I hadn't started it yet). She said, "I know you'll enjoy wearing it as much as I enjoy wearing the things you make for me." She's right.
I'll keep you posted on what I'm making with the silk noil. In the meantime, if you're looking for an idea for your own gift-making, here's a link to last year's how-to on the Mother's Day Corsage-ish.
Honestly, most of the time I get more enjoyment out of making gifts for other people than out of anything I make just for myself. But I'm feeling pretty special because someone who really knows me and is exactly the same size and shape as I am spent all this time on a gift for moi. I might do it more often.
You could inspire me to do that. So tell me: What's the best gift you ever made for yourself, or one you're working on or planning?
And I finally finished and blocked a gift for myself that I've been working on off-and-on for more than a year. This freeform looping vest was made from cotton yarn I got from my sister-in-law's BFF after she cleaned out a relative's estate. I overdyed the yarn in the indigo vat.
My closer-to-my-size dress form (bought at a garage sale) is still in a local store displaying willow-dyed scarves I have for sale there. This smaller dress form, also from a garage sale, is at least four sizes different from me, so the back looks almost bell-like on her.
On me, though, it skims right where I wanted it to skim, and I love the cross-knit looping edging.
I make a lot of stuff I use, and a lot of class samples. Sometimes, those are one and the same, like this little pouch I made working along with students in the current session of my New Age Looping Basics eCourse. It now holds the card reader for my computer.
But the freeform vest is the largest project I've made just for myself and just because in a long time. It's too casual to be impressive, and 99.9% of the world will look at it and assume it's crochet. I don't care. I'm a jeans-and-boots kind of girl, and I love it.
I phoned Mom to tell her I finished a gift for myself so hers might be a little late (since I hadn't started it yet). She said, "I know you'll enjoy wearing it as much as I enjoy wearing the things you make for me." She's right.
I'll keep you posted on what I'm making with the silk noil. In the meantime, if you're looking for an idea for your own gift-making, here's a link to last year's how-to on the Mother's Day Corsage-ish.
Honestly, most of the time I get more enjoyment out of making gifts for other people than out of anything I make just for myself. But I'm feeling pretty special because someone who really knows me and is exactly the same size and shape as I am spent all this time on a gift for moi. I might do it more often.
You could inspire me to do that. So tell me: What's the best gift you ever made for yourself, or one you're working on or planning?
Labels:
cross-knit looping,
gifts,
looping,
recycling
Tuesday, January 3, 2012
Holiday Gift Wrap-Up #4 -- Bags For Boys
For my last post on holiday gifts I couldn't show until after surprise was taken out of the equation, I present a pair of boy gifts and a plea: One of these boys has a birthday coming up, and I need help with ideas!
You may recall that, as a maker, I find boy gifts more of a challenge than girl gifts. Never having been a boy, never having had a brother, never having lived with a teenage boy -- that all seems to makes it tougher. My gift vision is clouded with memories of what these male creatures liked when they were 5, what I see on TV, and how much I want them to loveus our gifts. In other words, reality doesn't play much of a role here.
Luckily, economics does. And we don't have the money to buy safe things like gift cards. So it's simple: We have to find something to make, and it has to fit into our no-budget.
So I picked up a few extra T-shirts from the R&R bin at Bethesda (25 cents apiece). From that stash I made the two boys four drawstring stuff sacks each. I had a spool of cording on hand, but for the smaller ones I just cut strips of fabric from the T-shirts and stretched it out to make cording.
I also made each of them a 4-layer velcro-closed 2-pocket pouch. How they'll use them remains to be seen, but they were fun to make.
In just a few weeks, I'll need another boy gift for the 15-year-old's birthday. No ideas whatsoever. Suggestions, please!?! Pretty please? Hit the Comments link and tell me what you think. It won't be just me who appreciates it :)
You may recall that, as a maker, I find boy gifts more of a challenge than girl gifts. Never having been a boy, never having had a brother, never having lived with a teenage boy -- that all seems to makes it tougher. My gift vision is clouded with memories of what these male creatures liked when they were 5, what I see on TV, and how much I want them to love
Luckily, economics does. And we don't have the money to buy safe things like gift cards. So it's simple: We have to find something to make, and it has to fit into our no-budget.
So I picked up a few extra T-shirts from the R&R bin at Bethesda (25 cents apiece). From that stash I made the two boys four drawstring stuff sacks each. I had a spool of cording on hand, but for the smaller ones I just cut strips of fabric from the T-shirts and stretched it out to make cording.
I also made each of them a 4-layer velcro-closed 2-pocket pouch. How they'll use them remains to be seen, but they were fun to make.
In just a few weeks, I'll need another boy gift for the 15-year-old's birthday. No ideas whatsoever. Suggestions, please!?! Pretty please? Hit the Comments link and tell me what you think. It won't be just me who appreciates it :)
Friday, December 30, 2011
Holiday Gift Wrap-Up #3 -- A Stretch
Like the other girl gift I showed earlier in the week, this present included a pair of fingerless mitts made from upcycled fabric. And as usual, I learned some things making in the process of making this gift.
The fabric was a polyester stretch velvet in the form of a too-small short-sleeved mock turtleneck I bought at a thrift store a while back because I liked the color. Might have paid 50 cents. My very limited experience with machine sewing on a) velvet and b) stretchy velvet convinced me to keep my plan simple.
So I cut a pair of simple mitts from the shirt using a pattern I made from lightweight non-stretchy interfacing (also thrifted, by the way).
If you look closely at the left mitt, the seam fell on the palm instead of along the outside edge of the hand. Yup, I should have cut a full-size sample from an old T-shirt or other stretchy fabric to test the pattern before I cut the velvet. Oh, well. I fiddled with the placement of the thumb hole, recut the pattern, made a sample!!, and got back to work.
There was still enough fabric to cut another pair of fingerless mittens. They're a little shorter than the pattern. That's just the way my family likes 'em.
With the rest of the fabric, I pieced together a little hat, pinning and seaming to the intact mock T, which had plenty of stretch to become a hat band. With the wonky piecing, I didn't have to worry about the nap of the fabric.
I covered the back seam of the mock T with a little fabric flower pieced together from scraps and sewn on by hand.
My older-than-me Singer never handled knits well, so I gave up sewing them years ago. My newer hand-me-down Singer doesn't have a lot of bells and whistles (and I can't drop the feed dogs), but it handles knits much better.
These mitts were hemmed with a decorative stitch. The hat was put together with zigzag stitching. I'd been fantasizing about getting a sewing machine that would make free-motion stitching easier. Now I'm kind of thinking a serger would be fun.
But for now, I can do everything I need to do with the machine I have. It's just a tool. If I didn't have a machine, I could have stitched this gift by hand.
More important than the tool is the habit of sampling: I should practice what I preach!
The fabric was a polyester stretch velvet in the form of a too-small short-sleeved mock turtleneck I bought at a thrift store a while back because I liked the color. Might have paid 50 cents. My very limited experience with machine sewing on a) velvet and b) stretchy velvet convinced me to keep my plan simple.
So I cut a pair of simple mitts from the shirt using a pattern I made from lightweight non-stretchy interfacing (also thrifted, by the way).
If you look closely at the left mitt, the seam fell on the palm instead of along the outside edge of the hand. Yup, I should have cut a full-size sample from an old T-shirt or other stretchy fabric to test the pattern before I cut the velvet. Oh, well. I fiddled with the placement of the thumb hole, recut the pattern, made a sample!!, and got back to work.
There was still enough fabric to cut another pair of fingerless mittens. They're a little shorter than the pattern. That's just the way my family likes 'em.
With the rest of the fabric, I pieced together a little hat, pinning and seaming to the intact mock T, which had plenty of stretch to become a hat band. With the wonky piecing, I didn't have to worry about the nap of the fabric.
I covered the back seam of the mock T with a little fabric flower pieced together from scraps and sewn on by hand.
My older-than-me Singer never handled knits well, so I gave up sewing them years ago. My newer hand-me-down Singer doesn't have a lot of bells and whistles (and I can't drop the feed dogs), but it handles knits much better.
These mitts were hemmed with a decorative stitch. The hat was put together with zigzag stitching. I'd been fantasizing about getting a sewing machine that would make free-motion stitching easier. Now I'm kind of thinking a serger would be fun.
But for now, I can do everything I need to do with the machine I have. It's just a tool. If I didn't have a machine, I could have stitched this gift by hand.
More important than the tool is the habit of sampling: I should practice what I preach!
Wednesday, December 28, 2011
Holiday Gift Wrap-Up #2 -- Glove Love
Girl gifts are soooo much fun to make! For Christmas, the 16-year-old on our gift list got a pair of shabby-chic fingerless mittens made from old T-shirts.
One of my favorite speakers last summer at the Surface Design Association conference in Minneapolis was Natalie Chanin of Alabama Chanin. We can thank her for making reverse applique cool, as well as an economic boost to her hometown and keeping lots of T-shirts out of the waste stream.
Two of the three old tees used in this project originally resided in our closet. I was able to cut around the stains. The third was a probably-never-worn machine-embroidered souvenir tee I thrifted for 25 cents.
I layered the fabrics together and cut from a pattern I made by trial and error. I used a chalk marker to position the thumb hole. I think a disappearing marker would work better, if I could find where mine is.
What worked like a charm was the bent shaft scissors I bought some 15 years ago for cutting the reverse applique.
I didn't buttonhole stitch all the applique edges -- just the edges of the gloves, the thumb holes, and along the seam lines. There's a reason for the prices on those Alabama Chanin garments.
The three-layer thickness and machine stitching I used give these fingerless mitts some body. Maybe that's only important to me because I remember how frustrating it was when we played dress-up with Jody Newhart's mom's opera gloves and they kept sliding down.
Fingerless mittens went to another girl on our gift list. Next time.
One of my favorite speakers last summer at the Surface Design Association conference in Minneapolis was Natalie Chanin of Alabama Chanin. We can thank her for making reverse applique cool, as well as an economic boost to her hometown and keeping lots of T-shirts out of the waste stream.
Two of the three old tees used in this project originally resided in our closet. I was able to cut around the stains. The third was a probably-never-worn machine-embroidered souvenir tee I thrifted for 25 cents.
I layered the fabrics together and cut from a pattern I made by trial and error. I used a chalk marker to position the thumb hole. I think a disappearing marker would work better, if I could find where mine is.
What worked like a charm was the bent shaft scissors I bought some 15 years ago for cutting the reverse applique.
I didn't buttonhole stitch all the applique edges -- just the edges of the gloves, the thumb holes, and along the seam lines. There's a reason for the prices on those Alabama Chanin garments.
The three-layer thickness and machine stitching I used give these fingerless mitts some body. Maybe that's only important to me because I remember how frustrating it was when we played dress-up with Jody Newhart's mom's opera gloves and they kept sliding down.
Fingerless mittens went to another girl on our gift list. Next time.
Thursday, December 1, 2011
Fun Versus Functional
Where do you stand on the question of fun versus functional? I'm a big fan of fun. Big fan. But when you open a closet door and realize you haven't worn something in, what, four, five, six years? Yep -- time to turn it into something functional.
This is the remake -- a bag, modeled by my friend Stephanie.
This is what the bag was made from -- a vest, modeled by me. Long time ago.
Way back when, I wanted a vest that would be fun and floaty and make a dramatic entrance. I made this one by looping over a core of bias-cut fabric strips. That's right -- it's entirely hand-stitched. It took many hours and a full spool of Irish waxed linen. But I didn't spend a cent on the fabric: It was all upcycled from three boxes of goodies my friend Diane gave me after cleaning out her aunt's estate.
This fall, I decided to remake the piece before someone has to clean out my estate. So I cut off all the floaty bits (don't worry -- I saved them), seamed the thing together on the sewing machine, and added a braided leather strap.
I can't help but look at this vest now and wish I'd been able to wear it with the white vinyl lace-up granny boots I bought a really long time ago with a year's worth of babysitting wages. Loved them. Couldn't walk in them. If I still had them, I'd probably remake them into something else. Probably a bag.
So what would you remake if it was still in your closet? And what's there now that might be on its way to another incarnation that's both fun and functional?
This is the remake -- a bag, modeled by my friend Stephanie.
This is what the bag was made from -- a vest, modeled by me. Long time ago.
Way back when, I wanted a vest that would be fun and floaty and make a dramatic entrance. I made this one by looping over a core of bias-cut fabric strips. That's right -- it's entirely hand-stitched. It took many hours and a full spool of Irish waxed linen. But I didn't spend a cent on the fabric: It was all upcycled from three boxes of goodies my friend Diane gave me after cleaning out her aunt's estate.
This fall, I decided to remake the piece before someone has to clean out my estate. So I cut off all the floaty bits (don't worry -- I saved them), seamed the thing together on the sewing machine, and added a braided leather strap.
I can't help but look at this vest now and wish I'd been able to wear it with the white vinyl lace-up granny boots I bought a really long time ago with a year's worth of babysitting wages. Loved them. Couldn't walk in them. If I still had them, I'd probably remake them into something else. Probably a bag.
So what would you remake if it was still in your closet? And what's there now that might be on its way to another incarnation that's both fun and functional?
Labels:
alterations and repairs,
looping,
recycling
Friday, November 18, 2011
And I'd Like To Thank My Stylists...
Thank you to everyone who commented here and on my Facebook page for helping me decide what to wear to sell my willow-dyed silk scarves at a local show! Your advice helped me decide on this combination:
I take two of the 8" x 54" scarves and knot one corner together on each end to make a continuous circle scarf. Then I just loop it over my head. On my frame, three loops works well. And it's so easy to wear that last night when people asked how I tie my scarves I could pull it off and put it back on with no mirror. Easy -- that's my style.
Again, thank you to all my stylists! Bill drew a name for me this morning, and the winner of the free scarf is a commenter from Facebook. Congratulations, Victoria!
- brown linen shirt -- thrifted but restyled with different buttons and funky cuffs (sleeves are always too long for me). Thanks, Amy and Kim -- the brown instead of black had a nice glow in the lower light of evening. I was almost convinced there's still more brown than gray in my hair.
- black trousers
- bigger earrings than I usually wear. I took apart a copper pendant I made a few years ago and converted it into earrings.
I take two of the 8" x 54" scarves and knot one corner together on each end to make a continuous circle scarf. Then I just loop it over my head. On my frame, three loops works well. And it's so easy to wear that last night when people asked how I tie my scarves I could pull it off and put it back on with no mirror. Easy -- that's my style.
Again, thank you to all my stylists! Bill drew a name for me this morning, and the winner of the free scarf is a commenter from Facebook. Congratulations, Victoria!
Saturday, October 8, 2011
Halloween Tee Jewelry Tutorial
One of the things I love about Halloween is that it gets so many people involved in making. With a little help, they can get totally hooked, sort of like a human drinking V on True Blood. So here's a quick, easy project you can share with friends or family members who might be candidates for textile addiction.
The basic design can be used to make bracelets, chokers, and stocking or sleeve garters.This project uses recycled T-shirt fabric and inkjet heat transfer paper. For the transfer, I used a silent film still. You could use your own photos (fang close-ups, candy bait trail, ghosts of past pumpkin carvings...), text (blood type, zombie hunter ID...), or something from this free PDF.
Materials
Add Color. If you've printed text or a black-and-white image, add color if you like using crayons or pastels on the printed inkjet heat transfer paper.
Trim The Transfer. Cut away any borders around the image area.
Transfer To Fabric. Transfers need a hot, dry iron (no steam) and a hard surface (your ironing board is too soft). I use a recycled hardcover book covered with aluminum foil for transfers. Place the trimmed transfer face-down on white or light-colored T-shirt fabric on the foiled book. Cover the fabric and transfer paper with baking parchment. Apply the hot iron, repositioning it to make sure heat is applied to all parts of the transfer (even where the steam vents are in the iron's sole plate). With a preheated iron and a foil book to reflect heat, two verses of the "Happy Birthday" song should be long enough for a transfer this size.
Cool. Yes, it it, but what I mean is "let it cool." Move the fabric off the foil book to cool faster.
Peel & Polish. Peel off the release paper to reveal the image transferred to the fabric. To take down the shine, reposition the baking parchment over the transfer and apply heat for one verse of "Happy Birthday." Let cool before peeling off the parchment.
Trim. Trim, leaving a margin of fabric around the transferred image.
Layer. Cut two more layers of T-shirt fabric, each slightly larger than the image piece. The total length should be slightly less than what you need to stretch around your wrist, arm, ankle or thigh.
Stitch. Use your machine's zigzag setting or stitch by hand with a doubled thread to secure the three layers together.
Simple Cuff Finish. For a pull-on cuff, seam with wrong sides together, trim excess fabric, and you're done.
Variations. To make the piece more adjustable, instead of seaming the cuff do this: Cut off two hem pieces from the T-shirts you got your fabric from. Stitch one on each end of the fabric sandwich, taking care to leave the hem "tube" open. Cut narrow strips of fabric from those recycled tees and stretch them to make a cord. Thread the cord through the hem tubes and tie in a knot (for a semi-stretchy pull-on fit) or a bow (for a choker).
Distress. Give the finished piece a bit of texture by stretching the fabric to distress the transfer. (*Note that you won't get the distressed finish if you're using Dharma's SuperSoft Inkjet Transfer Paper, which is designed to stretch.)
I put up a free PDF with a few phrases you can use to make this project. Remember to use the Mirror Image print property when printing text to inkjet heat transfer paper. It will look backwards when you print it, but read correctly when transferred to fabric.
I'd love to see what you make for Halloween. Post pics at my Facebook page so we can all ooh and ah!

The basic design can be used to make bracelets, chokers, and stocking or sleeve garters.This project uses recycled T-shirt fabric and inkjet heat transfer paper. For the transfer, I used a silent film still. You could use your own photos (fang close-ups, candy bait trail, ghosts of past pumpkin carvings...), text (blood type, zombie hunter ID...), or something from this free PDF.
Materials
- Inkjet heat transfer paper (almost any brand* should do)
- Inkjet printer
- Optional: crayons or pastels
- Scissors
- Iron
- Baking parchment paper
- Optional: foil-covered hardcover book
- Recycled T-shirt fabrics -- light-colored for transfer layer, any color for other layers
- Sewing machine or needle for hand-sewing
- Thread
Add Color. If you've printed text or a black-and-white image, add color if you like using crayons or pastels on the printed inkjet heat transfer paper.
Trim The Transfer. Cut away any borders around the image area.
Transfer To Fabric. Transfers need a hot, dry iron (no steam) and a hard surface (your ironing board is too soft). I use a recycled hardcover book covered with aluminum foil for transfers. Place the trimmed transfer face-down on white or light-colored T-shirt fabric on the foiled book. Cover the fabric and transfer paper with baking parchment. Apply the hot iron, repositioning it to make sure heat is applied to all parts of the transfer (even where the steam vents are in the iron's sole plate). With a preheated iron and a foil book to reflect heat, two verses of the "Happy Birthday" song should be long enough for a transfer this size.
Cool. Yes, it it, but what I mean is "let it cool." Move the fabric off the foil book to cool faster.
Peel & Polish. Peel off the release paper to reveal the image transferred to the fabric. To take down the shine, reposition the baking parchment over the transfer and apply heat for one verse of "Happy Birthday." Let cool before peeling off the parchment.
Trim. Trim, leaving a margin of fabric around the transferred image.
Layer. Cut two more layers of T-shirt fabric, each slightly larger than the image piece. The total length should be slightly less than what you need to stretch around your wrist, arm, ankle or thigh.
Stitch. Use your machine's zigzag setting or stitch by hand with a doubled thread to secure the three layers together.
Simple Cuff Finish. For a pull-on cuff, seam with wrong sides together, trim excess fabric, and you're done.
Variations. To make the piece more adjustable, instead of seaming the cuff do this: Cut off two hem pieces from the T-shirts you got your fabric from. Stitch one on each end of the fabric sandwich, taking care to leave the hem "tube" open. Cut narrow strips of fabric from those recycled tees and stretch them to make a cord. Thread the cord through the hem tubes and tie in a knot (for a semi-stretchy pull-on fit) or a bow (for a choker).
Distress. Give the finished piece a bit of texture by stretching the fabric to distress the transfer. (*Note that you won't get the distressed finish if you're using Dharma's SuperSoft Inkjet Transfer Paper, which is designed to stretch.)
I put up a free PDF with a few phrases you can use to make this project. Remember to use the Mirror Image print property when printing text to inkjet heat transfer paper. It will look backwards when you print it, but read correctly when transferred to fabric.
I'd love to see what you make for Halloween. Post pics at my Facebook page so we can all ooh and ah!
Labels:
image transfer,
PDF,
recycling,
tutorials
Monday, September 26, 2011
Hats Off
Paperwork, mending, and a to-do list don't make exciting blog posts. But last week I tied up a lot of loose ends, did a bunch of mending, and got a birthday gift in the mail almost on time.
The gift isn't what I had planned to make. But right before I headed out to the studio to execute my plan, I saw a girl on TV wearing a beret and wheels started turning.
There was a once-white beret bought at a thrift shop in my studio stash, as well as a charcoal gray wool sweater, also thrifted. Both had been through the wash: That's SOP for thrifted stuff before it goes into the stash.
I used a wide zig-zag stitch to apply random appliques of the charcoal wool to the hat, and added extra lines of stitching. Acid dye and a quick steam transformed the color from once-white to amethyst. About this time I realized the flaw in my plan: I'd been hoping to get this gift in the mail the same day. When I switched from Plan A to Plan Beret, I skipped right over Dry Time.
Bill came to my rescue. It was a sunny day with a nice breeze. He suggested putting the piece on the hood of his black pick-up truck to speed up the drying time.
Worked like a charm. I pinned it to a towel secured under the windshield wiper and left it there over lunch. In just over an hour, it was dry enough to pin to the clothesline without stretching. It finished drying quickly, and I was able to get it wrapped, boxed, and to the post office that afternoon.
Next up on my gift to-do list are pieces for my sister and my mom. Must put "find the materials set aside for these" on my to-do list.
The gift isn't what I had planned to make. But right before I headed out to the studio to execute my plan, I saw a girl on TV wearing a beret and wheels started turning.
There was a once-white beret bought at a thrift shop in my studio stash, as well as a charcoal gray wool sweater, also thrifted. Both had been through the wash: That's SOP for thrifted stuff before it goes into the stash.
I used a wide zig-zag stitch to apply random appliques of the charcoal wool to the hat, and added extra lines of stitching. Acid dye and a quick steam transformed the color from once-white to amethyst. About this time I realized the flaw in my plan: I'd been hoping to get this gift in the mail the same day. When I switched from Plan A to Plan Beret, I skipped right over Dry Time.
Bill came to my rescue. It was a sunny day with a nice breeze. He suggested putting the piece on the hood of his black pick-up truck to speed up the drying time.
Worked like a charm. I pinned it to a towel secured under the windshield wiper and left it there over lunch. In just over an hour, it was dry enough to pin to the clothesline without stretching. It finished drying quickly, and I was able to get it wrapped, boxed, and to the post office that afternoon.
Next up on my gift to-do list are pieces for my sister and my mom. Must put "find the materials set aside for these" on my to-do list.
Wednesday, July 13, 2011
Doodle Sweater
In about 30 seconds, I can transform any plain white garment into a patterned garment. One or two little drips of whatever I'm eating or working with in the studio is all it takes. So I wasn't surprised that Bill laughed when he saw the plain white cotton sweater I found while thrifting.
It didn't stay white long, but that was intentional. I dyed it a light blue, but that seemed too plain. So one night while watching TV, I started doodling on it with FabricMate markers.
These are pigment-based markers. Let them dry overnight and they're permanent without heat setting. I doodled around the neckline on one side and on the bottoms of the sleeves. For a dollar's worth of sweater that will probably get paint on it the first time I wear it teaching, that's enough.
It didn't stay white long, but that was intentional. I dyed it a light blue, but that seemed too plain. So one night while watching TV, I started doodling on it with FabricMate markers.
These are pigment-based markers. Let them dry overnight and they're permanent without heat setting. I doodled around the neckline on one side and on the bottoms of the sleeves. For a dollar's worth of sweater that will probably get paint on it the first time I wear it teaching, that's enough.
Thursday, June 16, 2011
Dawning
My husband knows when I've been lying awake, trying to spot a glimmer of inspiration in the half-light of early morning. He waits to speak until he sees the change in my expression that passes for "Eureka" at that hour of the day. It dawns on me that the best idea I ever had was to make a life with him.
Dawning is showing through June 29 at the Ed Gray Gallery in Calumet, Michigan. Here's a peek at what went into creating this piece.
First I foraged for recycled cardboard in my husband's shipping department.
I used plain old white glue to to turn a bunch of pieces into a slab.
After gluing, I let the slab dry under a weight overnight.
After hacking on the cardboard with a knife long enough to demonstrate my intention to do it myself, I asked my husband to shape the cardboard laminate on the band saw. He even smoothed it on the belt sander for me.
I covered the mold with Saran to protect it from damp. Sorry -- forgot to take pictures of the process. In brief, I dampened buckram and pinned it to the plastic-wrapped cardboard mold and let it dry in place. The image above shows the trimmed buckram off the mold, and batting being fitted on the mold.
The fabric is silk I painted with Dye-na-Flow, recycled from a class demonstration for Designing Quilters in Fargo last March. The silk is underlined with a recycled dish towel. Some of the thread I painted with Dye-na-Flow, and some I colored with fabric markers. Judy, Ruth and Rhonda -- yes, I basted.
The looping on the inside is anchored to buttonhole stitch embroidery. I love to work this kind of freeform looping. It gives me time to think and reflect, which is what all the work in the Night Vision collection is about, really.
You can read about other pieces in show here, here and here. Next time I'll show the backstory on another of the pieces. In the meantime, I hope something wonderful dawns on you tomorrow. Leave a sketch pad by the bed tonight!
![]() |
| Dawning by Donna Kallner |
First I foraged for recycled cardboard in my husband's shipping department.
I used plain old white glue to to turn a bunch of pieces into a slab.
After gluing, I let the slab dry under a weight overnight.
After hacking on the cardboard with a knife long enough to demonstrate my intention to do it myself, I asked my husband to shape the cardboard laminate on the band saw. He even smoothed it on the belt sander for me.
I covered the mold with Saran to protect it from damp. Sorry -- forgot to take pictures of the process. In brief, I dampened buckram and pinned it to the plastic-wrapped cardboard mold and let it dry in place. The image above shows the trimmed buckram off the mold, and batting being fitted on the mold.
The fabric is silk I painted with Dye-na-Flow, recycled from a class demonstration for Designing Quilters in Fargo last March. The silk is underlined with a recycled dish towel. Some of the thread I painted with Dye-na-Flow, and some I colored with fabric markers. Judy, Ruth and Rhonda -- yes, I basted.
The looping on the inside is anchored to buttonhole stitch embroidery. I love to work this kind of freeform looping. It gives me time to think and reflect, which is what all the work in the Night Vision collection is about, really.
You can read about other pieces in show here, here and here. Next time I'll show the backstory on another of the pieces. In the meantime, I hope something wonderful dawns on you tomorrow. Leave a sketch pad by the bed tonight!
Monday, June 13, 2011
Within The Eye
When is the last time you lay on the grass to watch clouds and name their shapes? One of the pieces I made for my Night Vision collection started that way, sort of.
This piece is showing through June 29 at the Ed Gray Gallery in Calumet, Michigan. I used a bit of recycled metal and some plant materials to create marks on fabric, then worked with what I "saw."
It was more like seeing shapes in clouds than like the entoptic images painted on cave walls by some ancient shaman. But when I put down the needle and close my eyes for the night, I don't see clouds. I'm in the cave, with the story of a journey to share.
I layered the printed piece (a recycled pillowcase) over some silk from another dye experiment, then cut away parts of the cotton to reveal the silk.
I finished the cut edges with buttonhole stitches, and used the same sewing thread to work the looped filling on the figure.
The piece is framed with a recycled tablecloth, which I dyed and liked just fine until the piece was 80 percent done. After altering the color with fabric paint, the color was warmer and more evocative of the cave painting atmosphere I wanted.
I hope you have some time today to watch clouds skitter across the sky and imagine.
![]() |
| Within The Eye by Donna Kallner |
This piece is showing through June 29 at the Ed Gray Gallery in Calumet, Michigan. I used a bit of recycled metal and some plant materials to create marks on fabric, then worked with what I "saw."
| Before cropping |
It was more like seeing shapes in clouds than like the entoptic images painted on cave walls by some ancient shaman. But when I put down the needle and close my eyes for the night, I don't see clouds. I'm in the cave, with the story of a journey to share.
I layered the printed piece (a recycled pillowcase) over some silk from another dye experiment, then cut away parts of the cotton to reveal the silk.
I finished the cut edges with buttonhole stitches, and used the same sewing thread to work the looped filling on the figure.
The piece is framed with a recycled tablecloth, which I dyed and liked just fine until the piece was 80 percent done. After altering the color with fabric paint, the color was warmer and more evocative of the cave painting atmosphere I wanted.
I hope you have some time today to watch clouds skitter across the sky and imagine.
Subscribe to:
Posts (Atom)