

Where To Plant. You don’t need a country estate to grow enough willow to make a few trellises each year. Even in a small yard, if you have a sunny spot you can grow a few shrubs. Willow does not require a wet spot – just sun. A caveat: One reason willow is used to stabilize stream banks is the healthy root system the plants quickly develop. For this reason, don’t plant willow too near septic or water lines.
What To Plant. European basketmakers brought many varieties of willow with them when they emigrated to the United States, and many types are now cultivated here. The first willow bed I planted in (I think) 1995 was a jumble of cuttings I got from friends, stuff I cut from other patches, and things I picked out of the wastebucket at a workshop. The last beds I planted (and probably the last beds I'll have to plant) went in in 2002, and the only varieties I put in were Green Dicks and Dickey Meadows. I learned over the years that the rabbits and deer here leave the Green Dicks alone. They might munch on the Dickey Meadows, though, so I generally harvest it in the fall. For advice on what varieties might work best for you, find local willow growers who are familiar with your climate and probable soil conditions. They may also be willing to share cuttings, which we'll talk about shortly.
Weed Barrier. Willow doesn't compete well with weeds and grasses, so a weed barrier is a really good investment. Like most of what I know about growing willow, I learned from Jo Campbell-Amsler to use the kind of woven landscape fabric nurseries use on the ground in greenhouses. I spread the fabric on tilled soil and pinned it in place with anchor pins.
Mulch. Mulch helps conserve moisture, which is really important for the first year of a new willow bed. We got a pile of free wood chips from a crew trimming trees near power lines. I spread the chips on the landscape fabric before planting, because it's easier to shove and walk around before cuttings go in. Then I used a hoe to pull back the chips where I wanted to plant a row.

Poking Holes. My neighbor welded a fabulous tool for me, but you can use a large spike nail instead. You want to poke a hole for the willow cutting that goes through the landscape fabric and down into the soil. By making this hole at a bit of an angle, gravity works in your favor to make sure the soil settles down into contact with the cutting.

Plant The Cuttings. Poke the cutting into the prepared ground at a slight angle, making sure the buds are pointed up. Space the cuttings 8-12 inches apart and rows 24-36 inches apart, depending on the variety. Crowding the willow slightly yields straighter rods. Again, talk to growers familiar with your climate and conditions.
Water. Keep your cuttings watered well the first growing season to help them get their roots established. After that, they should be fine on their own.

Wait. The first year’s growth is liable to be sparse, branchy and pretty unruly looking. Not to worry. Harvest it anyway when the plant is dormant (fall or early spring). The next year's growth will multiply, and by year three you'll have a producer.
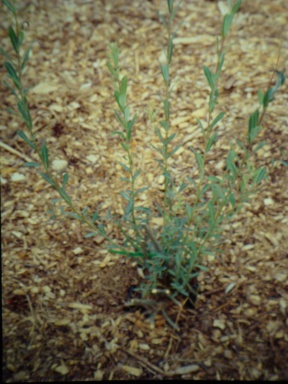


Most of the pictures here are taken from slides of that 2002 planting. Sorry for the poor image quality, but I hope you get the idea.
In a few weeks, I'll harvest some willow bark from plants I left in the patch. When I do, I'll share with you some information about using willow bark to color fabric, and how to make willow charcoal for drawing.
Are the willow varieties that you plant small types, or do they just not get big because you cut them each year. We have a native variety here in Texas, so just wondering about size. Thanks-Sherri
ReplyDeleteCutting them back every year (aka pollarding)is important in keeping them small. What we leave uncut for Bill's rustic furniture gets larger in diameter and branchy. Left uncut indefinitely, they'll become treelike. But size is influenced by other factors, too, including soil type and precipitation.
ReplyDeleteLike just about everything else in fiber art, willow can be sampled for the qualities that make a variety good for weaving. Cut a piece and wrap it around your little finger. If it's flexible enough to do that, it will probably be good for weaving. Just keep in mind that even willow that's good for weaving may not exhibit those qualities when it's actively growing.
I'll try to write a bit more about working with dried vs fresh willow before too long. You might want to sample your native Texas variety both ways. I'd be interested in your results!